New Updates for: P-38, P-51D, Spitfire and Bf 109; and new Blogspot places - March 30, 2020
Hello everyone. It's me Antony, back with another Blog during this quarantine phase while the World makes their best to find a (possible) cure for the COVID-19 pandemic. And nothing like a good Blog to entertain you.
For this Blog, I'm going to talk about new adjustments of the P-38 Lightning, P-51D Mustang, the Spitfire and the Bf 109.
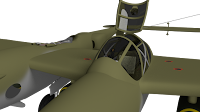
Let me show you the new renders of the P-38 Lightning:
I included a new armored headrest for the P-38, along the reflector gunsight to target enemy aircraft, warships, vehicles and bases.
Also, new fuel depots and adjustments for the wheels were included. I managed to fix some issues with the texture for the fuselage, nacelles, wings and ailerons. Now this majestic aircraft looks amazing.
Also, new fuel depots and adjustments for the wheels were included. I managed to fix some issues with the texture for the fuselage, nacelles, wings and ailerons. Now this majestic aircraft looks amazing.
Now the P-51 Mustang:
The Mustang received a new set of landing gears on the wings, along the flaps, ailerons, seat and gunsight. Also, I included a Gloss Material for the main materials - to make it shinning like aluminium. The ailerons and a space for the landing gears on the wing were quite tricky to make. This time I didn't used Boolean modifiers, but separating the vertices for the flaps and ailerons. And to avoid problems of exaggerated edges to subdivide the desired area while the mesh has the Subdivision surface, I used Inset faces.
The next thing to do for the Mustang is: Adjusting the cockpit reinforced glass and framing, aerial attachments, new landing lights down the wing, navigation panel, flaps from the 'belly' and the retractable landing gear on the tail. And animate it.
Now, let's go for the Spitfire:
The Spitfire received a new set of aerial attachments. Unlike the P-38 and Bf 109 - which the attachments were made as object; the ones for the Spitifre were made with Bezier curves. It's good in case you want something a more flexible thing like a metallic string over a solid object. But, the main disadvantage is: you can't rig properly Bezier curves into Armature unless you want to add the Child Of, Copy Rotation, Copy Location and / or Copy Scale.
Other included components were the landing gear on the wings, navigation lights on its wing-tips, the non-retractable landing gear on the tail has been completed, a small adjustments on the wings coming from the main fuselage and flaps from the radiators. I included some letters along the RAF roundel on the main fuselage. Most of the British aircraft that fought in World War 2 has different combinations for their registered aircraft. Funny thing is: if I would switch places with Z and B, I would have DBZ - the initials for Dragon Ball Z (lol). Putting jokes aside, I'm not sure I plan to venture into Dragon Ball as the next topic after Claymore.
Like I did to the Mustang, I attached the aircraft to the Armature after appending it from the P-51 project. It has the propeller spinning animation, which will save me from hard work. But still, I have to make more animations for those two aircraft.
The next thing to do for the Spitfire is: The fairings attached to the landing gears of the wings, adjusting the cockpit and adding its internal components, wing flaps, texturing the aircraft and making more animations like I did for the P-38.
Lastly, the Messerschmitt Bf 109. I recorded a new video while making new adjustments on that German aircraft. Let me show you what I did so far:
I remade the landing gears on the wings and rearranged its alignment to the wheels. Beyond that, I extracted a considerable part of the wings to make the flaps and a small portion from the radiators. The black circle and yellow triangle were included in a non-recording moment while I was making more decals for German aircraft. And yes, I plan to make Erich Hartmann's Bf 109 - despite he commanded a G model of the 109. But don't worry, it will receive the F, G, K, T and Z versions.
Also, I made a slight rearrangement on the propellers, which by far looks good.
The next thing to do for the Bf 109 is: New navigation lights, adjusting the fairings radiator flaps, open a space on the wings for the landing gears, cockpit components like the gunsight, navigation panel, texturing the aircraft and rigging it. Pretty I'll rig it while the modelling procedures is still in progress.
With this aircraft and the others in their concluded stage, I'll make some short animation movies for test and probably some aircraft simulator on Unity.
One more thing: I created new Blogspot places to spread my works beyond Blender renders. In case you don't follow me on DeviantArt, I wrote a journal saying the reason for creating two new Blogspot places: One for literary works and one for gaming development and projects. I'll leave the link to that journal here for you to read it. (https://www.deviantart.com/tonytoriusimages/journal/Plans-to-expand-my-content-and-works-with-Blogspot-835129288) I may put them into activity when I can, so stay tuned for them as well. Also, their links will be shared here, or you can go to my profile and find them by yourself.
Well, that's it for today. I hope you enjoy it. I'll be back with more Blogs in this year. I plan to share more artworks and other things I did in my time. Until the time comes, you will be surprised to see it. See you next time.
My DeviantArt:
My second Youtube channel:
My other Blogspot places:
My Facebook page:
My Instagram:
Note: Don't you dare to download these images and re-share it without my permission. If you do, please, leave the original author name.


Comments
Post a Comment