New videos and new updates for: Macchi C.202, Panzer IV, Panzer I and Bf 110C-7 - July 22, 2023
Hello everyone. It's me Antony, back with another blog in 2023. I know. Now that I'm working and studying, my time for Blogs decreased to some occasions. At least it is good to be back at work.
A while ago, the town hall announced a new civil service exam for this year - with some to the education and health departments. I may give it a shot, but it will be the same thing as before - Reserve my rest days for study. If I fail, it would be another civil service performed, with my money being spent for nothing.
For the calling process to work as a teacher, probably I'm going to give it up due to the lack / low numbers of vacancies for mathematics teachers.
Enough of that, let's go for the important. For this Blog, I'm going to show you the new renders of the Macchi C.202, the Panzer IV, the Panzer I and the Messerschmitt Bf 110 C-7.
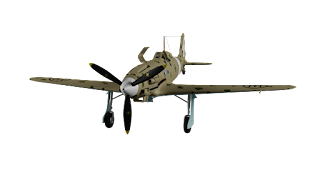
Macchi C.202 Folgore:
The Macchi C.202 received some changes after the last time I visited the project. New components added are: the instrument panel, the reflective sights, the stick and the pilot seat.
I decided to add these components to my Macchi C.205 Veltro and Fiat G.55 Centauro, although the reticle is different from the C.202 according to War Thunder and IL-2 Sturmovik 1946. The lighting was slightly decreased.
The Panzer IV is almost finished. I made some small changes on the middle chassis and I concluded its towing hook, the base for the rear wheels and the support beam for the spare tracks located in front of the chassis. At least this German medium tank is almost finished to receive a nice texture and rigging.
Speaking of rigging tanks, I decided to make the Armature for the Panzer I.
To attach the Panzer I into an Armature was a little tricky, especially about its gun mantlet and the tracks (precisely the Curves). I had to adjust the bone for the mantlet in order to make it rotate according to the main structure. The Bezier Curves had to be attached by Child Of constraint, otherwise it would remain still while the tracks would go off while the main bone or the tank's bone would go to any place. I could use the Parent option, but I need to test it.
The hatches for the chassis are attached to its bones, but the locking pins are duplicates via Alt D - reflecting the Weight Painting from one to another. I plan to make its texture along the other smaller components. At least it is my first tank rigged.
Well, that's it for now my friends. I hope you like this Blog. In case I have some spare time to enjoy, I'll be working on other things aside from Blender projects and my personal things. Until the time comes, you will be surprised to see them. See you next time.
My DeviantArt:
My second Youtube channel:
My other Blogspot places:
My Facebook page:
My Instagram:
My ArtStation:
Note: Don't you dare to download these images and re-share it without my permission. If you do, please, leave the original author name.


%20test%20149.png)
%20test%20150.png)
%20test%20151.png)
%20test%20152.png)


Comments
Post a Comment